Category: Nature/Science

  • Sounds and Sights from Space

    I have some catching up to do, but I am going to start from where I am right now, and then post about what I have been doing since my last post in August. The short version is that I have gotten my radio(s) working, and have even gotten on the air with both POTA (Parks on the Air) and a DX (a direct contact that was a long distance away).

    What I did tonight that I think was fun and exciting was trying to get an image from SPACE. There’s a group called ARISS – Amateur Radio on the International Space Station – that is aimed at kids to get them interested in science and technology using the frame work of making ham radio contacts with astronauts. For World Space Week they are doing an event this weekend where a transmission of SSTV signals are being sent from the ISS using the 2 meter VHF band. SSTV is Slow Scan Television, which is a way to send still pictures over the air, mostly by amateur radio these days. So they are sending a couple of different images for radio operators to “hear” and use software to decode the sounds into images.

    To receive this I installed an app on my iPhone to track the position of the ISS so I know when it passes over me. I also have an app on my phone to decode the sounds into the images.

    Since VHF signals are line-of-sight – in other words, I need a clear view of where the Station is in the sky, with no buildings or land in the way, I was afraid that the arc the Station was going to take would not allow me to get the signal where my house is. So I took my handheld VHF radios (I have a Baofeng UV-5R and a TIDRadio H3) to a place I know of that has a big parking lot, and is closed and has a huge field next to it with a lot of open sky. I go there sometimes to watch storms or see colorful sunsets.

    A brilliant sunset with lots of orange shines over a big grassy field across from a suburban neighborhood, with a highway in the distance.
    Part of the field next to where I parked. Texas sky, showing off as usual.

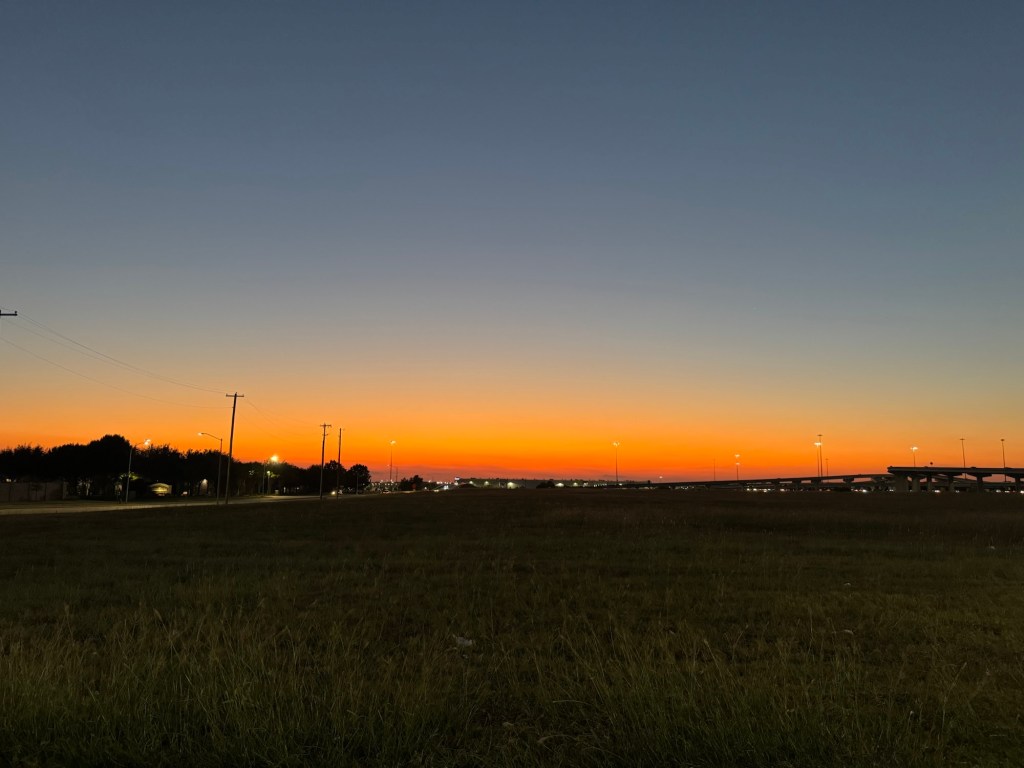
    I was way early, arrived and parked, and ate some junk food while watching the sunset. When I was finished, I listened to a podcast and made sure my radios were ready to go. I had a problem recently with the TIDRadio where it wasn’t able to transmit, and I had reset it to factory defaults (I think it got messed up when I tried programming it with some repeaters). It seems to be working but I don’t completely trust it, so I planned on using my Baofeng.

    Then I fumbled the Baofeng, and did not realize that the A/B button got pushed. Both my radios can be set to have two frequencies to monitor, and you can push a button to quickly swap between them. When I dropped it, it swapped to a different frequency, not the one I needed it to listen to. So when it was time to turn it on and listen for the transmission, I was hearing nothing. So I grabbed the TIDRadio and turned it on, and could hear the modem-like sounds of the transmission! I had my SSTV decoder app running and it got part of the image:

    A garbled image, mostly bright green with some magenta, red, yellow, and purple blobs at the bottom, and partial text visible with the letters ISS visible.
    Not quite right…

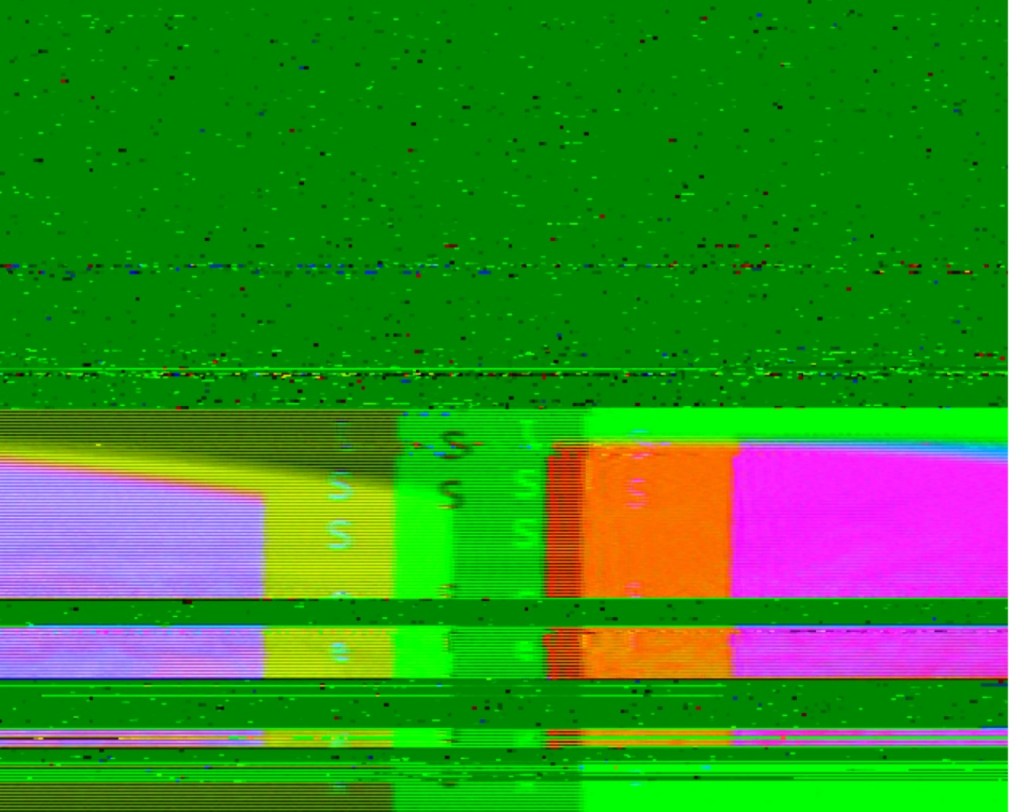
    As you can see, I didn’t get enough to properly decode the image, but there a more passes tomorrow where I can try again.

    Even though it technically is a failure, but I was still getting kind of excited and giddy, because I was hearing something that CAME FROM SPACE! That’s really cool!

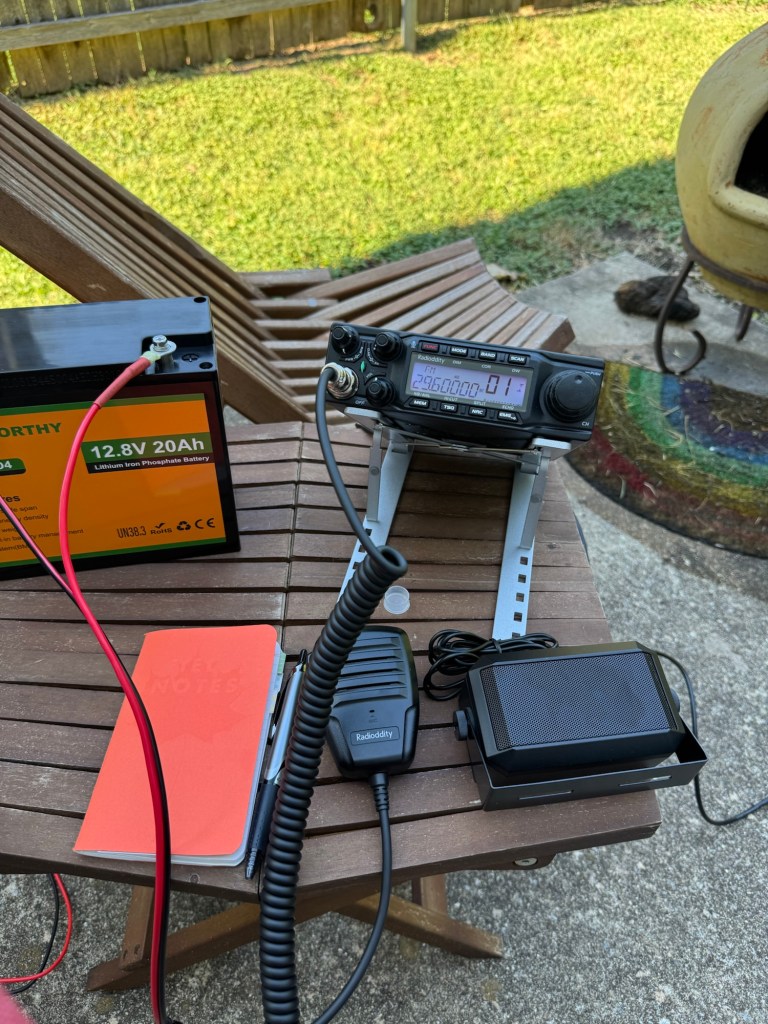
    So tomorrow, I will be trying again, and I think the angle is good enough that it should work from home. I might as well set up my 10M radio as well and hunt POTA activators while I am at it! I will make another post soon about my HF fun, as well as update the space picture adventure results.

    For my next attempt at the IIS images, here is what I learned:

    1. I have my apps ready to go a few minutes before the pass
    2. I should double check the frequency the radio is set to!
    3. Don’t drop the radio! 😀

    Better luck to me tomorrow!

  • Powering through nervousness…

    Today I was determined to finally get all the parts I needed to make the power cable I need to get power from my 12V-20Ah battery to my QT80 radio. I got myself out of bed bright and early (ok, it was more like 9am) and headed out to Harbor Freight for the first time ever. They did not have the ring terminal connectors I needed, but I did end up dropping – you guessed it – fifty dollars on a new set of flush cutters to cut wire since the wire cutters I found in the toolbox in the garage were an abomination that more chewed through wire than cut cleanly, as well as a wire stripper that also works as a crimper, and a few other items as well. I also picked up a small tool bag in which to keep my radio-related tools.

    Then I went to Ace Hardware on the suggestion of the clerk who helped me at HF, but the guy that “helped” me was less than helpful and acted like I was looking for something unreasonable.

    A thunderstorm was rolling in, so I grabbed lunch and headed home to eat. I thought I was going to have to order what I needed online, and wait yet another week, but it occurred to me while having lunch that maybe an auto parts store would have the connectors, so I hopped back in the car after the storm was over and was successful in my quest!

    I got home and was able to create the cable I needed to connect the battery to the radio:

    A photograph of a cord in my hand. One end of the cable has two ring terminals and the other has a set of Anderson Powerpole connectors.
    Handmade power cable

    After I made the cable, I used my multimeter to make sure the cable had conductivity through it on both sides.

    I also re-did the Powerpole connectors I added to the end of the radio’s power cable because after making the battery cable, I knew I had not secured those sufficiently. After doing all that, I was finally ready to plug in my radio!

    And it WORKED!

    I had power to the radio, it turned on!

    I was very nervous that I had done something wrong somehow, and the battery was going to catch on fire, but it did not, and it didn’t seem to be heating up or anything.

    I fiddled with the radio a bit but soon realized that I need to sit down and flip through the manual and maybe re-watch the QT80 videos to get a feel for how to operate the radio. I could move through the band a bit, but not with confidence, and I only caught a voice twice, without a good signal.

    I need to watch some videos on how to use the NanoVNA to set up my antenna at the right lengths for the bands I can receive on this radio, and on my (tr)uSDX, which also needs to have a way to power it that’s a little more beefy than USB phone bank power.

    I have a battery case and some 18650 batteries on their way to make a nice portable setup for that radio… and you will never guess how much that cost! Yes, that was sarcasm. It was right around $50, of course.

    Getting the power cable made was a nice little confidence booster, proving to myself that I did comprehend what I had researched, and that I am not going to set myself on fire or electrocute myself, or damage my equipment. At least, not so far!

    My goal this week: figure out how to make the radio “hear” more than faint sound! Fingers crossed!

  • Sea Monkey Keeping

    One of the things I have been enjoying this year is keeping Sea Monkeys – remember those comic book ads? They are still around, and have competition, even!

    If you follow me on Bluesky, you will have seen my posts for #SeaMonkeySunday – I figured if cats can have Caturday, pet brine shrimp can have a day as well.

    I set up my first tank in late March, a very old school Sea Monkeys “Magiquarium” with a glow in the dark tank bottom.

    A sea monkey tank with a blue lid and base, with a molded, glow-in-the-dark interior base that looks like a low volcano caldera.
    Sea Monkey tank

    The next month I added a different brand, the Aqua Dragons. I really like the design of their tank, it’s very sleek and unobtrusive to viewing.

    The clear plastic Aqua Dragons tank sits on a counter next to the Sea Monkeys tank. It is slightly shorter and thinner, but wider. It has a molded plastic mountain range at the bottom. In front of it is the lid, an accessory magnifying glass that came with it, the packet of eggs and salt, and the papers explaining care.
    Setting up the Aqua Dragons tank.

    It has been really fascinating watching these tiny crustraceans develop. In a couple of days my Sea Monkeys tank will be 4 months old. I am down to only three individuals left.

    Sadly, on Tuesday the last remaining Aqua Dragons died, so I have only the Sea Monkeys left.

    I spent entirely too much time making a memorial video for the Aqua Dragons, which I share with you now:

    RIP Aqua Dragons

    They are, in theory, the exact same species of brine shrimp, so I do not know why they lasted only 3 months while the Sea Monkeys are still going at 4 months with 3 individuals. They sat side by side the whole time.

    I have another Sea Monkeys tank kit waiting in the wings should these ones go to the big tank in the sky. These little critters are surprisingly interesting, and my interest in these crustaceans expanded to isopods and keeping those, which means I also have springtails. I will detail more about them later though.

    They are a very low stakes pet to keep, and pretty easy once they are hatched, so I encourage anyone to set up a tank. They are fun and make me happy every time I peer into the tank.